Robotics-II-Circuit-Python
Circuit Python tutorials in Robotics II
View the Project on GitHub MrPrattASH/Robotics-II-Circuit-Python
Table of Contents
Digital IO (In/Out)
Let’s get into our first physical component. We’re going to make our onboard LED blink on the M4 board.
Video Tutorial
Text Tutorial
The onboard LED is a red LED with the “L” next to it. By the end of this tutorial, you’ll be able to turn this on and off.
The rest of this tutorial is borrowed/modified from this AdaFruit Tutorial and has been modified to suit the needs of this course.
Practice Code
copy and paste the following code into your code.py and run it on your board
import board
import digitalio
import time

led = digitalio.DigitalInOut(board.LED)
led.direction = digitalio.Direction.OUTPUT

while True:
    led.value = True
    time.sleep(0.5)
    led.value = False
    time.sleep(0.5)
The little LED should now be blinking. Once per half-second.
Congratulations, you’ve just run your first CircuitPython program to make physical hardware function!
Code Breakdown
Libraries & Modules
At the top of the code, you see 3 import statements
import board
import digitalio
import time
CircuitPython is designed to run on microcontrollers and allows you to interface with all kinds of sensors, inputs and other hardware peripherals. Unlike standard Python, most CircuitPython code includes hardware setup which requires various modules, such as board or digitalio. You import these modules and then use them in your code.
- A “module” is a library or piece of code that has been written for you and allows you to extend your code beyond normal capabilities.
- in the code above, we imported 3 modules
- board
- this tells us what pins we can use and what hardware/sensors exist on the metro M4
- digital io
- think about chrome extensions. Ublock origin is a “module” that adds ad-blocking functionality to your browser.
digitalioadds the ability to use digital sensors (INputs) or devices (OUTputs), hence, digitalio (digital in/out) - digital sensors are simply on or off, like a light switch. The switch is our digital IN sensor, and the light itself is the digital OUT (on/off)
- think about chrome extensions. Ublock origin is a “module” that adds ad-blocking functionality to your browser.
- time
- allows us to use time based functions like pauses, timers, etc.
- board
LED Initialization
below our import statements, we have 2 lines
led = digitalio.DigitalInOut(board.LED)
led.direction = digitalio.Direction.OUTPUT
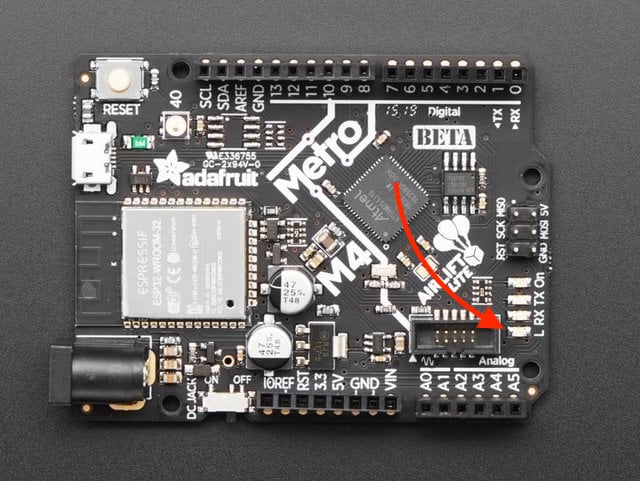
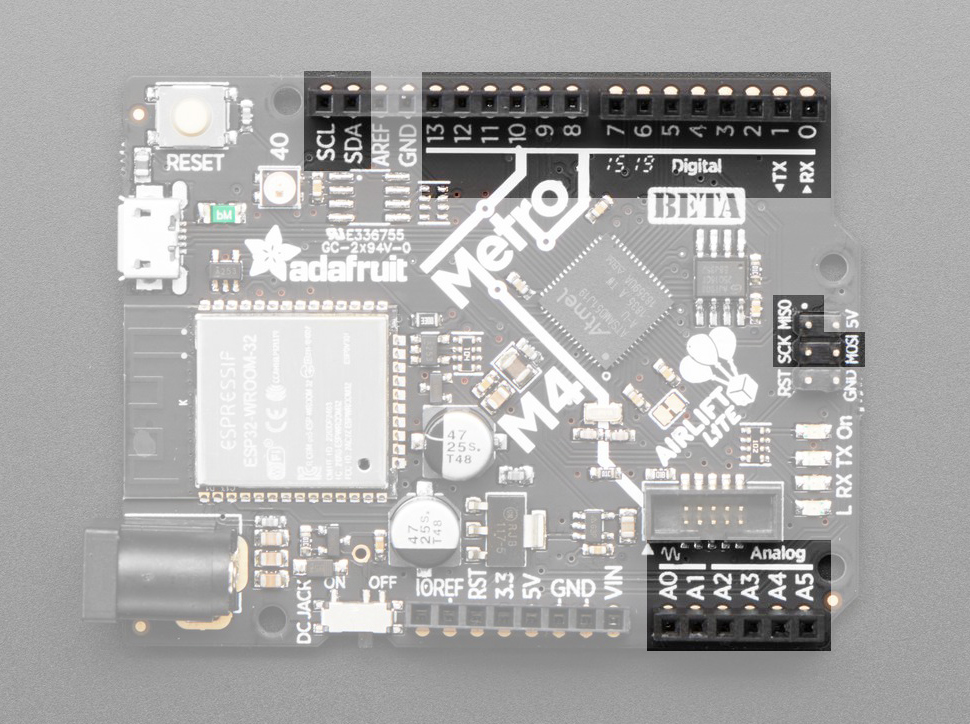
led = digitalio.DigitalInOut(board.LED) creates a digital object variable called led and assigns it a digital in/out (io) pin. Looking at the board below, we have:
- 14 Digital In/Out pins
- These can turn lights on/off, or read on/off sensors
- 6 Analog In/Out pins
- these can output a range of values, like a volume slider. They can also import a range of values from an analog sensor, like a microphone, noise sensor, light sensor, temperature sensor, etc.
- these can output a range of values, like a volume slider. They can also import a range of values from an analog sensor, like a microphone, noise sensor, light sensor, temperature sensor, etc.
led.direction = digitalio.Direction.OUTPUT sets the direction of our digital object.
- INPUT: would be for a sensor. like a button or a light switch. We want to read values from sensors, so the object connected to this pin is an input.
- OUTPUT: would be a light, motor, or other device that we want to write values to. Turn light on/off, etc.
while True:
Now we start our main loop. Note the indentation of the while True loop, similar to a list in a word doc:
- Main list item
- Sub list item #1
- Sub list item #2
- New list
while True:
  led.value = True
  time.sleep(0.5)
  led.value = False
  time.sleep(0.5)
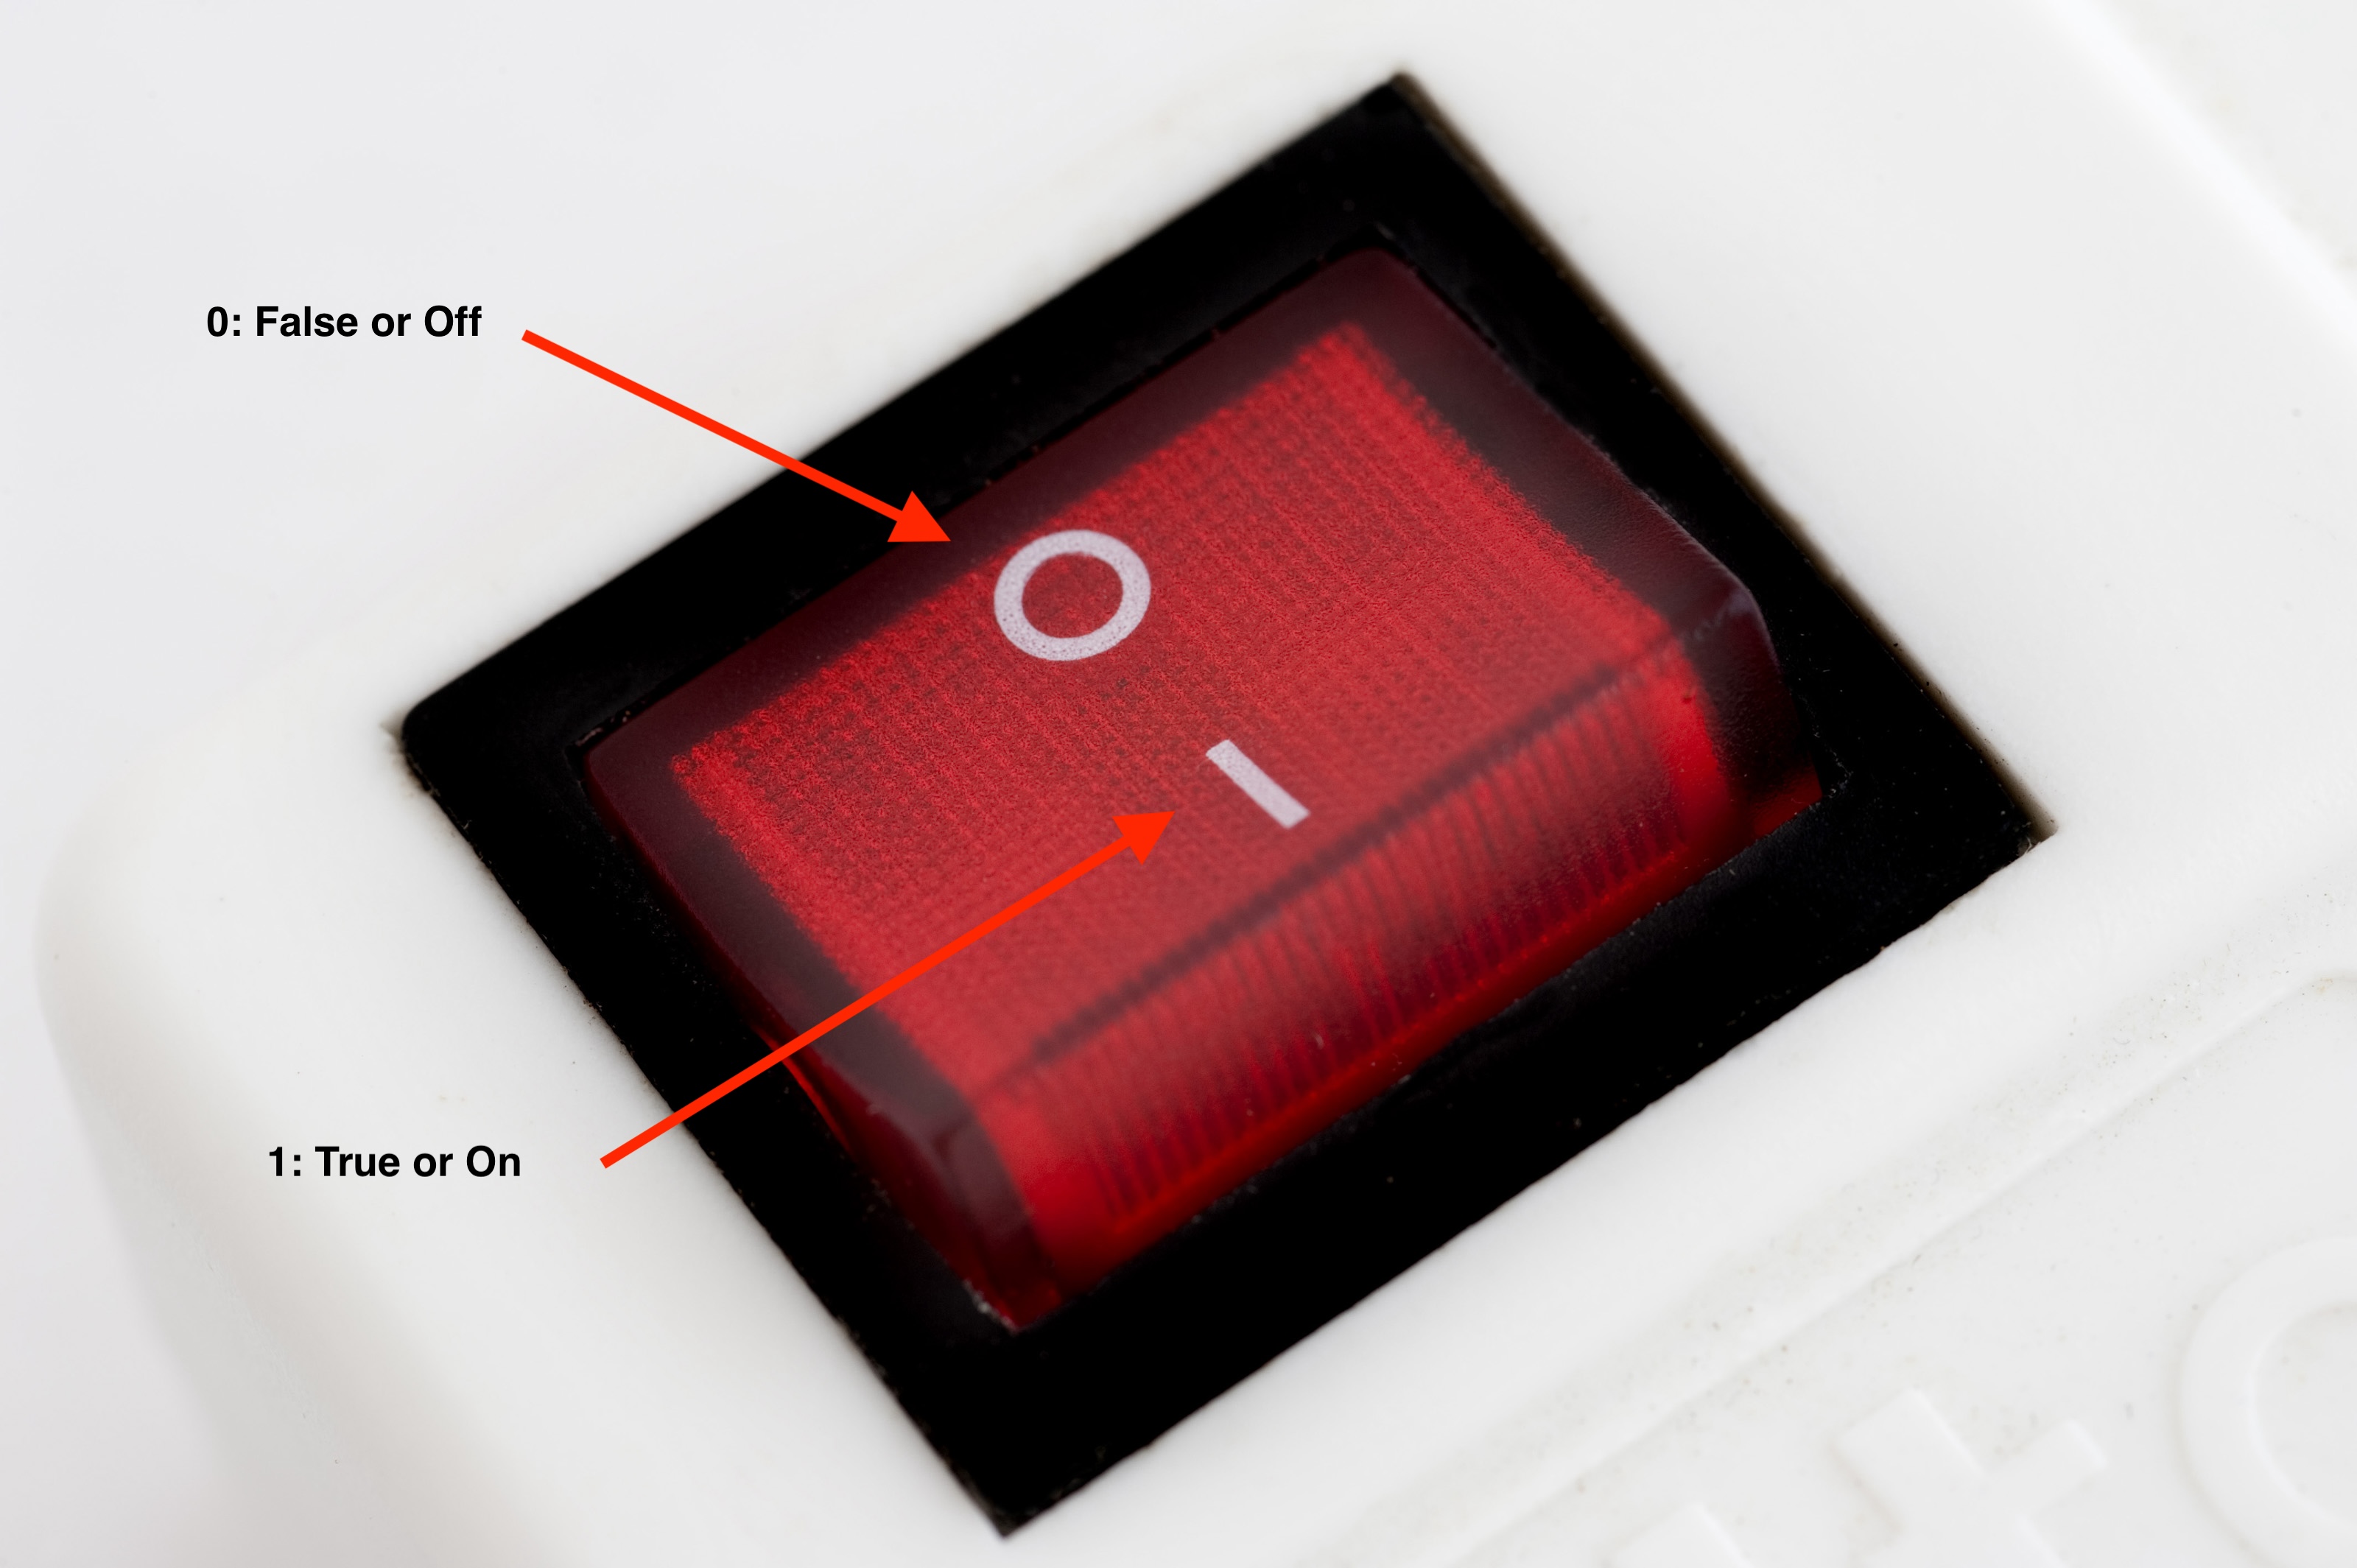
led.value = True tells us to send a 3.3v signal over our pin to turn ON the digital device. This is known as it’s value, which can be boolean, True or False. True is on, False is off, or 1 is on, 0 is off, much like a power switch.
time.sleep(0.5) takes the time module, and calls the sleep method. This is a handy “method/function” from the time library/module that lets us take breaks in second incriments. Similar to led.value, it uses something called dot notation, which means we can write a module/variable, then a . dot, and we get a list of methods that we can use from this object.
- After this, we run all 4 lines, then repeat back to the top of our
while True:loop, repeating this .5sec on, .5sec off loop forever. - Go ahead and change the value of
time.sleep(0.5)to something like(1)or(0.1). What changes to you observe to the LED?